Sunday, July 15, 2012

I finally got enough done to start showing pictures. I picked this up in New Mexico last year. NO rust,school activity bus

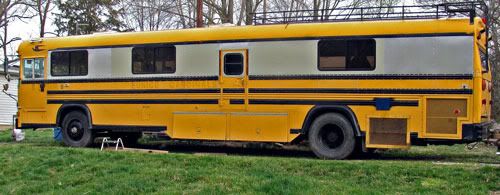
White part done, two coats of Buskote plus clear. Windows installed and Indiana RV title on it's way


The blue needs some touchup where I messed up. amd I still have some lights to install, and the new heated
 mirrors, but now I can get on with the inside.

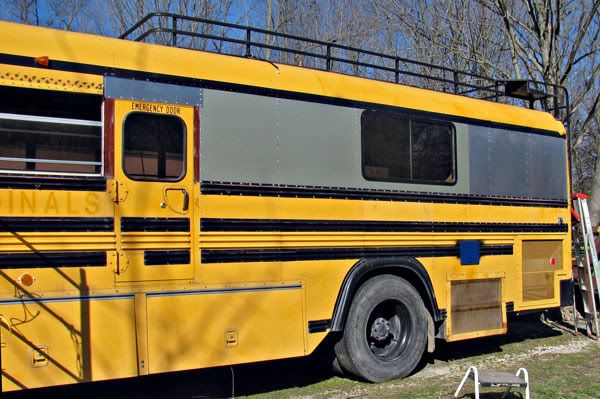
I didn't like the way the front access doors latched, I couldn't get them adjusted so they would close tightly
I found these latches at an RV surplus place. The key isn't really a key, just a removable handle. After the turn,
a quarter turn more pulls the latch in about 1/4 inch, closes the door tightly against seal.


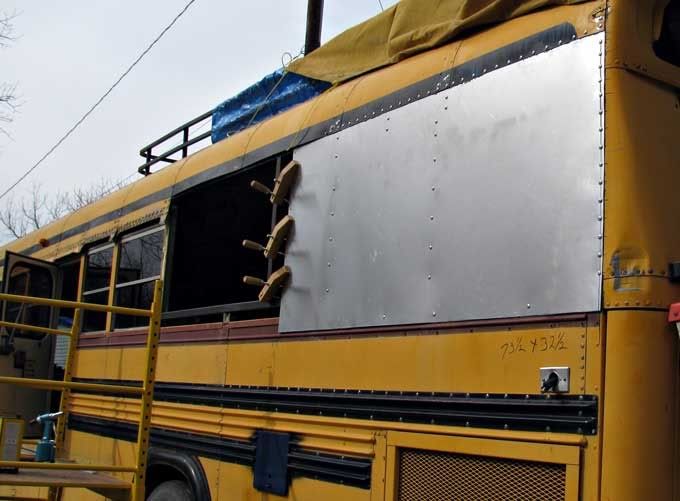
The Buskote really seems to work. Outside temp, sitting in full sun was 94, window holes still covered with plastic,
(no ventilation) inside temp 94. After installing the windows and opening them inside temp dropped 2 degrees.
Ceiling was only warm to the touch. Working on the outside you can lean your forearms, on the white part and not be
at all uncomfortable. while I was painting I couldn't stand to stand on the yellow with just my socks on.

Monday, March 19, 2012

What beautiful weather we're having. I got a lot done this week. The left side is all done as far as new skin and windows is concerned. I'm really happy with how things are going, it's looking less and less like a school bus. Now I have to start all over again on the other side. But, first I have to straighten things up a bit and remove the over head rack and air conditioner from the inside.


Weather report is for more warm weather, but it might start raining too..

Saturday, March 10, 2012

Don't you just love it when you do something and it actually LOOKS like you got something done. I got the first section of skin on and the first window mounted today. Only about 50 feet and 8 more windows to go. This is a lot of work, but, I think it looks a lot better than just filling in each window. Besides,  the way Bluebirds are put together, with that individual eyebrow above each window, there isn't really a good way to fasten the top of any individual panel short of kinda just gluing it in.  I was also able to get the bottom of the window high enough so that it will be above the kitchen counters.

Wednesday, March 7, 2012

Wow, what beautiful weather we're having.  I took advantage of it and got the first skin put on today. WOOHOO.
As with everything the first took a while to figure out how I would do everything. I got Mumsywumsy involved in holding some bolts I couldn't reach.  I had to pull the area where I cut the old roof back into place so I could rivet things back together. We put a bolt in every other hole, then riveted  then replaced the bolts with rivets. After we got going on it, it really didn't take long. Hopefully the rest of this side will go quickly since I now know how I'll make the window frames and install the skin.

Thursday, February 23, 2012

While the weather isn't quite cooperating,  it has been really nice here. Not quite to the point where I want to open up the whole side of the bus to the weather. I took some time to so some cleaning up so I can walk around in there again. I also have been working on some of those small things that need to get done so something else can get done.

I'm not one to do something the conventional way,  and my heating system is no exception. I'm going to have in floor hot water radiant heat, and since none of the parts I'm using is really meant for the purpose, I have to get everything ready and adapted to accept the pex tubing I'm using.  Each room will have it's own thermostat which controls a water pump to circulate water to that room. Here's a picture of the gang of water pumps, their relays, and the manifold at the other end with air bleeds.

Not really much to take a picture of, but it is really colorful.
 I also have the boiler, water heater and heat exchanger ready for the pex.

 Hopefully the weather will get to the point that I can work on the windows and skin soon.

Friday, February 10, 2012

I have to wait until warmer weather to start the really big job of removing the bus windows and skinning the sides prior to painting. In the meantime, I got the lock installed  for the back door. The door is about half way back on the driver's side. I plan on using it mostly for loading groceries and supplies, but also want it to be operable from the inside in case there might be an emergency. Most of the added locks I have seen can only be opened from either outside or inside.


Inside


Outside


I almost have the box for the external power cord installed, but as usual things were more difficult than planned. I had to cut through some of the rub rail ribs, and now have to weld inserts into the open ends. Pictures to follow at a later date.


Monday, January 30, 2012

I got the electric door lock finished and installed today, I think it works pretty cool. Note in the crack between the door and jam you can see the dead bolt move into the door. That just about finishes up all I can do on the door frame until it gets warm enough for paint to dry.   It can be actuated either by remote control or a key switch on the outside. There will also be a switch on the inside. While I was at it I removed a lot of wiring that had to do with the flashing lights and side stop sign.
The next project is building the service entry box where the 50amp cord will plug into the bus for shore power.